Tinning a soldering iron means putting a small amount of solder on the hot iron tip (also known as an iron bit of the soldering iron).
Tinning a soldering iron is the process of coating its tip with a layer of molten solder. The name “tinning” comes from the fact that the alloy of solder consists of tin and lead combination.
The solder melts and flows around the iron tip. The solder should cover all surfaces of the iron tip.
Learning how to tin a soldering iron takes just a couple of minutes.
The tinning of soldering iron is a simple process. It is not as scary or as difficult as you may be thinking.
The brand new soldering iron should be tinned before the first use.
If you need to install a new iron tip in the existing soldering iron it should be tinned before the first use, as well.
When replacing the iron tip make sure that it tight before use.
Soldering iron is the most important tool in the soldering operation. A soldering iron is a tool that generates heat. It is used in hand soldering to melt the solder in a variety of soldering projects. It is usually electrically powered.
The main parts of soldering iron are the heater, tip, and handle.
Proper use, care, and maintenance of soldering iron is a crucial part of each soldering project..
It is not uncommon for a brand new iron tip to be oxidized out of a bag. Even though the manufacturer cleans iron tips when they come out of the factory, there may be a little oxidation on the tip.
When tinning a brand new iron tip don’t tin at high temperature 700°F (371°C) or 800°F (426°C). Instead, set the iron to a very low temperature 500°F (260°C).
Iron tip requires proper maintenance in order to increase its lifetime and keep it properly functioning as long as possible. Whether you solder at home for your hobby or have a full-time soldering position in a manufacturing facility, soldering tip preparation and maintenance are key for ensuring quality work and the long life of the tip.
Normally, you would tin a soldering iron just before the soldering operation and immediately after you finished soldering. In addition, you should clean and tin soldering iron whenever you notice oxidation, remains of flux, or other contamination on the working part of the iron tip.
Tinning soldering iron before soldering is necessary since iron tip quickly oxides when is not in use.
Tinning soldering iron at the end of the soldering project decreases the level of oxidation while the iron is not in use since a layer of solder on the iron tip forms a barrier to environmental influence. After tinning, the iron tip will have a nice protective coating of solder all time while not in use. It will help to minimize the oxidation that will inevitably happen on the iron tip.
You always should tin iron tip when you finish soldering or when you having a break to protect it from oxidation.
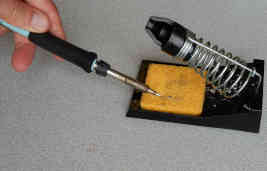
Tinning should be done while the soldering iron is still turned on and hot. Place the soldering iron in the iron stand, apply plenty of solder on the tip. and then turn off iron.
Don’t wipe excess solder from the tip. Solder on the iron tip will solidify and prevent oxidation.
Many companies claim that their iron tips don’t require tinning after use since their improved technology eliminates the need for tinning. However, feedback from users suggests that tinning is highly recommended even for tips manufactured with new and improved technology. In any case, it doesn’t hurt to cover the iron tip with a few drops of solder after you finish your soldering work.
Tinning and cleaning tips of soldering iron with a moist sponge should be done as much as necessary to ensure your iron tip is always clean. Cleanness is one of the most important factors in the soldering process.
For the proper soldering process to occur both, the tip of soldering iron and the metal surfaces being soldered should be clean. When an iron tip is clean and tinned it will provide good heat transfer to the solder joint.
One of the mistakes that beginners in soldering often make is struggling to solder with a dirty iron tip which results in a poor soldering joint. Soldering with the clean and tinned iron tip will help beginners and hobbyists to start on the right foot and easier learn the basics of soldering.
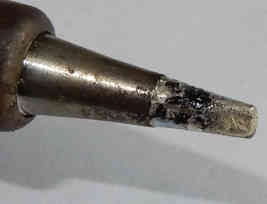
Oxidized iron tip
The biggest enemy with soldering tips is oxidation.
When an iron tip is oxidized it turns to a darker color.
Oxidation doesn’t transfer heat. When the tip is oxidized it will not transfer heat properly.
So if you notice that your iron tip is oxidized don’t solder with it because you are not going to make a proper soldering connection.
Before you start soldering you need to clean the tip from oxides and other contamination and then tin it.
The high working temperature of soldering iron is one of the biggest factors in the fast oxidation of the iron tip. The higher the temperature the faster will be oxidation of the tip.
Modern soldering irons can be programmed to go in sleep mode whenever it is not in use. When iron is in sleep mode the temperature of iron is lowered. That way iron is protected from rapid oxidation. When you ready to continue soldering just press the “up” or “down” button on the base station and the temperature comes back to set working temperature.
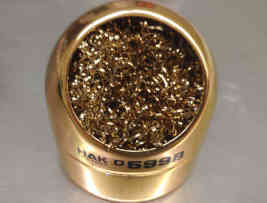
If you notice excessive corrosion or other contamination on the iron tip then first clean it with non-abrasive brass wire tip cleaner.
Insert hot soldering iron in brass wire tip cleaner and twisted it a few times before tinning the iron tip.
You may use a tip tinner to remove stubborn contamination.
However, don’t use sandpaper, steel brush, or file and similar tools to clean iron tips.
Most of the iron tips we buy these days are made of copper and covered with coating. The working end of the iron tip is covered with iron plating and the rest of the tip is covered with chromium plating.
Copper transfers heat very effectively. Using sandpaper to clean the iron tip will damage or completely removed the coating on the iron tip. As result, the tip will not transfer heat properly and copper will faster oxidize.
Copper transfers heat very effectively. Using sandpaper to clean the iron tip will damage or completely removed the coating on the iron tip. As result, the tip will not transfer heat properly and copper will faster oxidize.
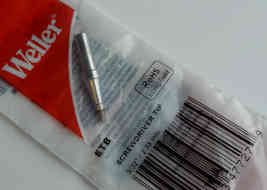
If the iron tip is so corroded that is not possible to clean or tin it, then it is time to buy a new one. You don’t need to buy new soldering iron - you need to buy only a new iron tip and install it in the existing iron. Iron tips are not expensive.
It is helpful to have a small collection of iron tips in different sizes and shapes for different soldering projects.
Solder wire contains rosin flux in its core. If you use flux-cored solder, you do not need to apply extra rosin flux on the tip. When flux is heated with a soldering iron it changes from solid to liquid state. This process results in fumes coming from flux. Flux from the core of solder wire cleans the oxidation.
Therefore, before you start tinning a soldering iron you should provide proper ventilation at your work station or turn on a portable fume extractor that will absorb fumes produced during soldering
Wear a pair of safety glasses at all times when soldering.
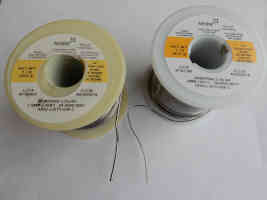
Most of the solder wires come as an alloy of two metals, tin and lead, in proportion 60/40 (60% tin, 40% lead) or 63/37 (63% tin, 37% lead).
Working with a lead-free solder is a little bit more difficult.
Lead-free solder eats the plating of an iron tip at a much faster pace than 60/40 or 63/37 tin/lead solder.
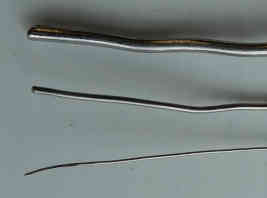
Solder wire comes in different thicknesses.
For tinning soldering iron use a medium-size soldering wire, around 0.050 inches (1.27 mm).
For smaller conical iron tips you may use soldering wire which diameter is around 0.031 inch (0.8 mm). Small conical iron tips are used for fine soldering work such as soldering surface-mount components to a circuit board.
I prefer to work with a thinner solder because it is easier to control how much solder I am applying to the solder joint.
How to tin a soldering iron tip
This guide explains how to tin a soldering iron used in electronics for soldering electronic components to circuit boards.
Turn on your soldering iron and wait some time until the soldering iron gets hot and reaches working temperature. The majority of today’s soldering irons will be ready for soldering in less than a minute.
Once the soldering iron is hot, apply some solder to the iron tip and allow it to melt. Add more solder, if needed, to cover all surfaces of the iron tip. Don't be afraid to flood the tip with solder.
Wipe off the excess molten solder on the iron tip with a moist soldering sponge.
A sponge should be moist, not soaking wet.
A sponge should be replaced when it gets dirty
All you need to do is a quick wipe of each side of the iron tip – you don’t need to keep sitting your iron on the sponge.
Just a quick wipe should remove all excess solder from the tip.
You will hear a hissing noise when the hot iron tip touches the moist sponge.
Soldering sponges are made specifically for soldering and can withstand high temperatures of soldering iron.
Don’t use a kitchen sponge for this operation.
It is recommended to use sponges that have a hole in the center so when you wipe the tip the excess solder drops into the tray.
It is recommended to use de-ionized water instead of regular tap water for the soldering sponge. De-ionized water is very pure comparing with tap water which contains minerals.
You should leave a thin layer of solder to remain on the iron tip. This will help that molten solder flows easily from the iron tip onto metal surfaces being soldered during the soldering operation.
You will leave more solder on the iron tip if you wipe excess solder on non-abrasive brass wire tip cleaner than when you wipe it on the moist sponge.
Tinning soldering irons with bigger and longer iron tips
Tinning soldering irons with bigger and longer iron tips are done differently. Solder wire with a smaller diameter (around 0.031 inch – 0.8 mm) is used in this technique. Solder wire is wrapped all way around the iron tip while soldering iron is not plugged in the power source and, therefore, the iron tip is cold.
Then the iron is plugged into a power source. Once the iron is hot enough, the solder will start to melt and flow around the iron tip. Excess of solder is wiped on soldering sponge and the iron tip is ready for soldering.
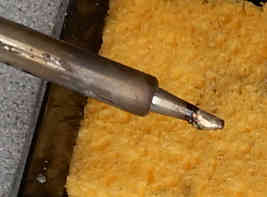
After tinning, the iron tip should look bright and shiny.
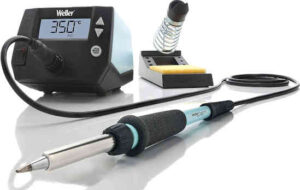
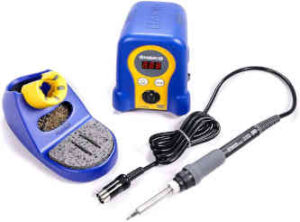
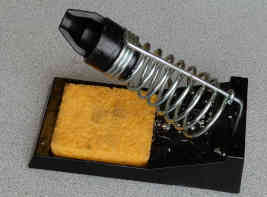
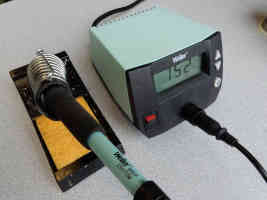
Most of the soldering irons used for soldering circuit boards are temperature-controlled irons.
They come with a base station, an iron stand, and a sponge.
It is possible to set and maintain an accurate temperature on the iron tip. That way you will avoid overheating of iron tip.
The too high temperature of the iron tip is one of the main causes of tip corrosion. Most of
the soldering projects in electronics can be done with iron temperature in the range of 660- 750°F (350-400°C). On the majority of the temperature-controlled soldering iron is possible to set temperature up to 840°F (450°C). It will be less corrosion on the iron tip if the majority of soldering work is done at temperatures lower than 750°F (400°C).
Unregulated soldering pencil comes without a base station so there is no possibility to control temperature on the iron tip and set it at a lower temperature.
You simply plug the soldering pencil in a power outlet, so the iron tip may get overheated if the iron is used for a prolonged time.
How long your soldering iron tip will last depends on a lot of variables: