The most popular technique for removing the solder without a pump utilizes a solder wick.
Solder wick (also known as solder braid) is made of stranded thin bare copper wire saturated with flux.
It is easy to learn how to remove solder without pump. In this technique, you need to apply heat with a soldering iron. The wick is applied in a sandwich between a solder joint and a soldering iron tip.
How to remove solder without pump depends on the circuit board and components on it.
Circuit boards may be single-sided, double-sided or multilayer boards. Electronic components on the circuit board may be through-hole or surface-mount (SMD). Components come in different sizes and shapes from tiny surface-mount integrated circuits to large passive components.
In order to remove solder from the solder joint, we need to have access to that place on the circuit board. The Circuit board is susceptible to damage during solder removal. Damage may happen due to the combination of heat and pressure from soldering iron. This results in burned solder pads and conductors or delamination of conductive copper foil from a base material of the circuit board.
Place the wick over the solder joint. Press the wick with the tip of soldering iron.
You should always apply light pressure when removing solder.
In any circumstances, you should not apply more pressure than you would get from the weight of a soldering iron.
The wick will get very hot - you can take your hand off it as soon as you press it with iron.
If you wish to keep holding it you should hold it at a place that is at least 10 cm from the end which is pressed with iron.
After a few seconds the wick will start absorbing molten solder.
Add more liquid flux to the wick if needed.
Once the cooper wick looks saturated with solder, remove the iron tip and the wick simultaneously to avoid soldering the wick to the board. .
Move the wick along the soldering joint - one portion of the wick may not absorb all solder. Use a new part of the solder wick each time it is applied to the soldering joint.
Cut the previously used part of the wick with wire cutters since it is already full of absorbed solder.
Solder wick may also be used to clean a thin layer of leftover solder on the circuit boards. This may happen when a broken or old surface mount component is removed from the circuit board with a hot air soldering station. You may use isopropyl alcohol to remove the dross.
How to Remove Solder without Wick
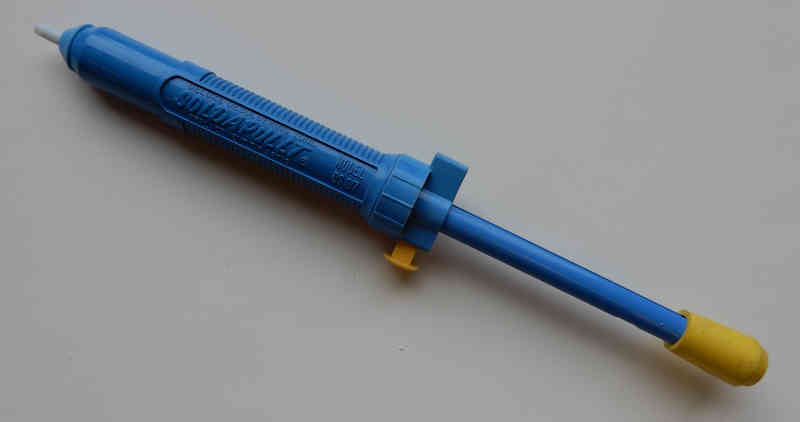
In this technique, you may use a solder pump (also known as solder sucker or desoldering pump). The solder pump is another tool for removing excess solder. It is a spring-loaded plunger with a plastic or metal tip through which the vacuum is applied.
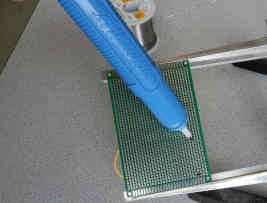
You need to apply both the solder pump and soldering iron at the same time to the solder joint. First, melt the solder with soldering iron. Then push the plunger of the solder pump down until it locks.
Insert the tip of the solder pump into the molten solder.
Finally, push the button on the solder pump which releases spring and that way creates a vacuum for a limited time.
This operation pulls molten solder into a solder pump.
Press the plunger again and any solder in the solder pump will be ejected.
Repeat this step to remove all the solder from the joint.
The application of this technique depends on the size of the solder joint. This technique may be easily applied on the through-hole circuit boards, where the solder joints are large and easily accessible.
However, these days most of the circuit boards are populated with tiny surface-mount components. They have small solder joints, so it is not possible to simultaneously apply both soldering iron tip and vacuum solder pump.
Since there is not enough space to apply both iron and pump simultaneously, we will remove solder in two steps. First, melt the solder with iron. Then quickly remove the iron and apply the pump to suck the melting solder. This technique requires good coordination when switching from iron to the pump.
Clean solder pumps after each use.
How to Remove Solder from Circuit Board
When you have to repair an electronic device or need to replace a broken electronic component you may ask yourself how to remove solder from circuit board.
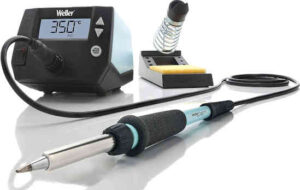
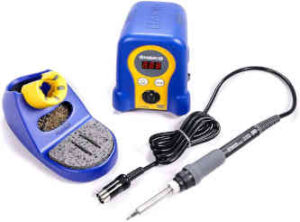
The best way to remove the solder from circuit board is with a professional rework station. The rework station provides a controlled combination of the heat and solder extraction with a continuous vacuum. This technique can be applied to any solder joint on the circuit board regardless is it through-hole or surface mount solder joint.
Professional soldering stations come with several handpieces for soldering and desoldering. One of the pieces is a solder extraction tool. The solder extraction tool consists of a hollow metal tip, heater, transfer plastic tube for transfer of liquid molten solder and plastic chamber that collects all removed solder. This kind of electric soldering tool comes with a base unit that provides vacuum, adjustable pressure and temperature control.
In order to remove solder, you first melt the solder at the solder joint with a heated tip. Hold the extraction tool lightly against the solder joint with no additional pressure. Hold it the same way you hold a soldering iron.
Place the tip over the solder joint so that it is at a right angle to the PCB board. Then you push the switch to activate the vacuum. Molten solder is withdrawn from the joint and deposited in the plastic chamber. Clean the chamber when the solder cools down and you finish solder removal.
Solder extraction tools come with different sizes (diameters) of hollow tips and different suction power. The tips may be easily changed. It is recommended to choose and use the best tip size for each particular application.
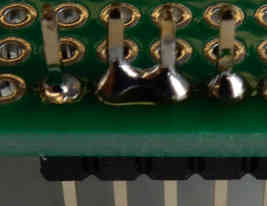
Remove a Solder Bridge
A solder bridge is formed when too much solder is added and melted to the solder joint and soldering iron accidentally touches another pad or hole.
Excess of solder makes a bridge to a neighbouring joint.
This results in a short connection between those two soldering joints.
A solder bridge can be easily fixed. Apply soldering iron to the solder bridge. When the solder melts, swiftly swipe the iron between those two soldering joints. Wipe the iron tip on a sponge and repeat if necessary.
If the previous technique doesn’t work then remove a solder bridge with either a solder wick or solder pump.