Soldering a potentiometer doesn’t require many tools. This tool is not costly. In this “How to solder a potentiometer” guide we are using the following tools:
soldering iron
wire strippers
wire cutters
heat-gun
third-hand tools (also called helping hand tool)
fume absorber (also known as fume extractor)
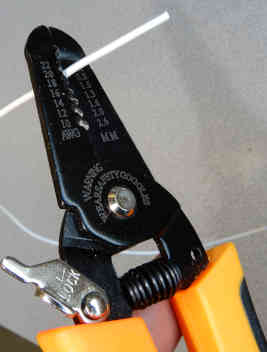
There are several different kinds of wire strippers on the market in the USA, with the cost ranging from five dollars to over a hundred dollars.
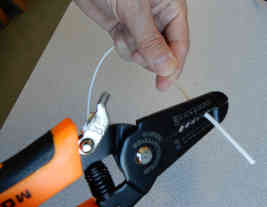
You don’t need to buy professional-grade wire strippers for the simple task of soldering potentiometer, however, we recommend purchasing wire strippers with a gauge index (as one in this picture).
When you strip wire using an appropriate gauge slot you will not scratch or damage the surface of bare copper wire.
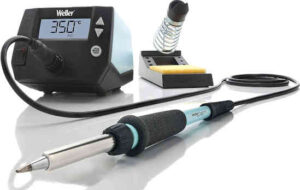
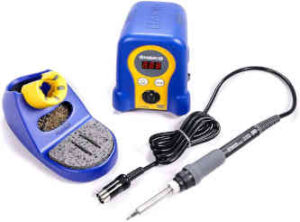
Even dough soldering a potentiometer doesn’t require a very accurate setting of temperature at the tip of soldering iron, we strongly suggest buying one of the temperature-controlled soldering irons. In addition to temperature control settings, this soldering iron comes with a good iron stand with a sponge.
Temperature-controlled soldering irons are not expensive anymore – you can purchase a decent one for less than $ 50.
If you are using a cheap soldering pencil to solder a potentiometer you can ruin your work.
Safety precaution
Wear safety glasses.
Solder in a well-ventilated area or use a bench-top fume extractor.
Always keep a soldering iron in the iron stand
Stripping wire
Strip about 1/4” (6 mm) of insulation using wire strippers.
Use a proper gauge slot on wire strippers to avoid scratching of copper wire.
Tinning
Prior to soldering, you should tin wires and the leads of a potentiometer.
Tinning is a process of applying a thin layer of solder to the surfaces of components to be soldered.
Tinning makes the soldering operation easier because it prevents the oxidation that occurs during soldering.
Before tinning clean the leads of the potentiometer with alcohol or another appropriate cleaner. If the surface of leads is not clean a proper tinning may not occur.
While a soldering iron is cold and not connected to power, you should replace the iron tip.
In this guide, we are using a chisel tip 1/16” (1.60 mm) for soldering a potentiometer.
Turn on soldering iron. If you are using a temperature controlled soldering iron, set temperature to 700 °F (371 °C)
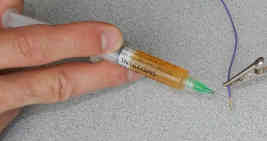
Use a third-hand tool to hold the wire.
Then apply a small amount of rosin flux to the wire.
Flux helps to better solder surfaces by chemically reducing the metal oxides that form when the metallic surfaces are exposed to air, and protecting them against further re-oxidation during the soldering operation.
Traditionally, soldering was done with a pure solder wire - and flux was applied separately. The majority of today’s soldering is done with flux-core solder wire – flux is embedded in the core of solder wire. This way the flux releases onto the metallic surface as the solder itself melts. It doesn’t hurt to separately apply a small amount of flux even when using a flux-core solder wire.
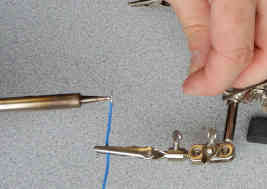
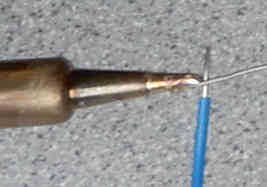
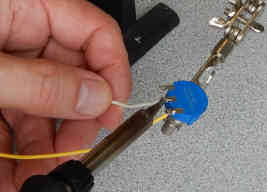
Take soldering iron from the iron stand and place its tip on the exposed part of the wire.
Hold it for a couple of seconds to allow the exposed end of the wire to heat.
The rosin flux will melt and flow around the wire. There will be some smoke coming from rosin flux when it changes from a solid to a liquid state, caused by heat.
Now, apply a small amount of solder on the wire, to the point where the iron tip touches the wire. Solder is an alloy of tin and lead.
Repeat this step for all three wires that will be soldered to three leads of the potentiometer.
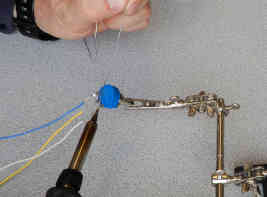
Remove wires and place the potentiometer in a third-hand tool. With one hand you will hold a soldering iron, with the other hand you will feed the solder, so you will need some kind of holder to hold a potentiometer.
In this guide we are using a third hand tool to hold a potentiometer, however, for bigger sizes of a potentiometer, you will need a small vise or a similar holder.
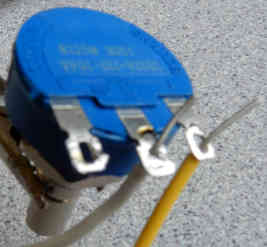
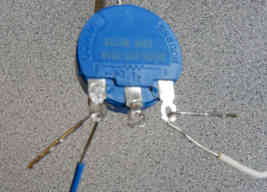
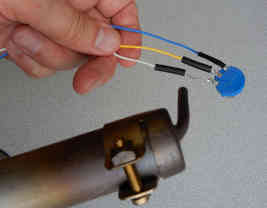
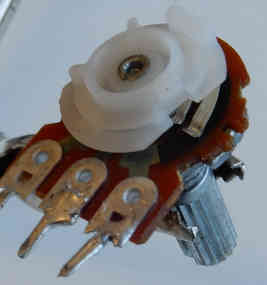
Most of the potentiometers come with leads that have holes inside them.
Run the tinned wires through holes on the leads.
Make sure that the wire fits the leads of the potentiometer. In other words, check if is possible to run wires through the holes on the lead - if the wire is too thick it won’t be possible to insert it through the hole.
Insert the wire in the hole to measure the proper length of the wire.
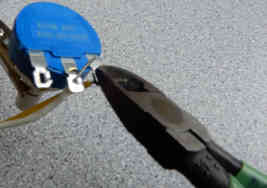
Cut the excess of the wire using wire cutters.
Soldering
Soldering is a process in which metallic surfaces are joined by molten solder with a melting temperature of less than 840 °F (450 °C).
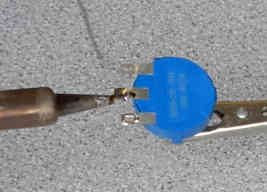
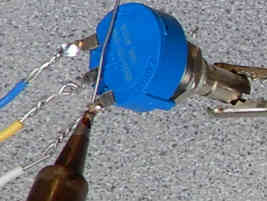
Before soldering, tin the lead of potentiometer with solder.
Place iron tip to the lead of potentiometer and after a few seconds apply solder.
The solder will flow on the lead and in the hole. Add enough solder to fill the entire hole inside the lead.
Quickly push the wire through the hole filled with solder while solder in the hole is still hot and liquid.
Remove soldering iron and clean the iron tip on the moist sponge.
You may solder the wire to the lead without pushing the wire through the hole. Simply place the wire parallel with the lead and heat them together simultaneously with soldering iron.
Don’t hold soldering iron at lead for too long. Too many times I have seen people make mistakes when they heat leads of potentiometer too long or too short – a few seconds is the right time.
This technique is a simple way of soldering a potentiometer. Also, it is easier to de-solder wires from the potentiometer in the case that you need to repair the device and replace the broken potentiometer.
Stronger connection
For stronger connection between wire and leads of the potentiometer is used the following technique.
Strip about 3/4” (1.9 mm) of insulation using wire strippers.
Tin the wire and terminal on the potentiometer with a thin layer of solder.
Don’t fill the hole with solder- keep the hole open.
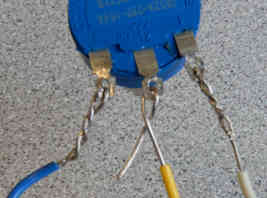
Insert the wire in the hole.
Twist the wire five times with fingers.
Use pliers to twist thicker wires.
Cut the excess wire with wire cutters.
Place soldering iron to the connection of wire and terminal and heat them simultaneously.
Apply solder to the connection.
Make sure that solder fills the hole.
It takes only a few seconds to make a proper soldering connection between wire and potentiometer.
Remove soldering iron and place it iron stand.
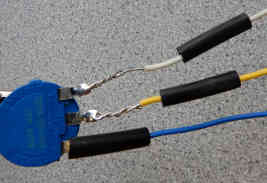
Once you soldered all three wires to the potentiometer you need to protect those connections from short circuits and corrosion.
The best solution for sealing the solder junctions is a heat-shrink tube.
A heat shrink is a plastic tube in different sizes that typically shrinks when heated. It is available in many colors and could be clear as well. The most used color of the heat-shrink is black.
Cut the heat-shrink tube at least 50% longer than is exposed length of wire since it will shrink when heat is applied with a heat gun.
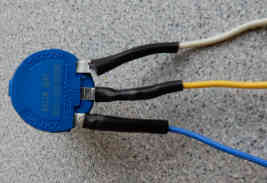
Move the heat-shrink tube over the lead of the potentiometer and apply heat with a heat gun.
The piece of the heat-shrink tube should be long enough to cover all exposed parts of the wire and the entire lead.
Trimpot vs Potentiometer
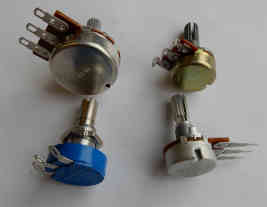
A potentiometer(also called a pot) is a variable resistor with a sliding or rotating contact. It is used to control the level of electrical signal in an electronic circuit.
Potentiometers are usually mounted on the front panel of electronic devices and connected with wires to the rest of the electric circuit.
Wiring of a potentiometer to the circuit board can be done with stranded wire or solid wire. Stranded wire is more flexible than solid wire.
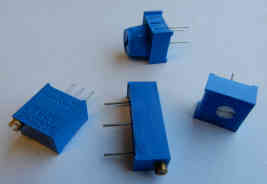
A trimpot (also called trimmer potentiometer) is a small potentiometer that is used for fine adjustments of signals in electronics.
Trimpots are usually soldered directly to the circuit boards.
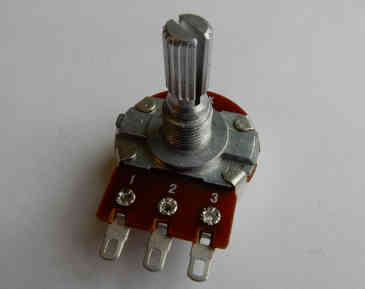
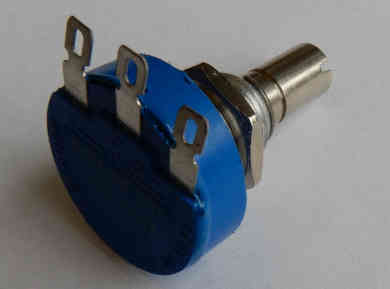
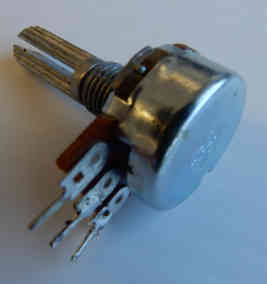
Potentiometer consists of the resistive element and adjustable wiper.
Potentiometer has three terminals.
The first terminal is connected to one end of the resistive element, the second (middle) terminal is connected to the adjustable wiper and the third terminal is connected to the other end of the resistive element.
When a user turns a shaft, it turns a sliding contact along the resistive element in the body. This changes the resistance of the potentiometer and then changes the level of voltage and electric current in the circuit.
A potentiometer can be used as a regular resistor by using only two of its tabs.
When comparing trimpot vs potentiometer, the main differences are:
Size
Shape
Adjustment
A potentiometer is bigger than a trimpot and can withstand higher electrical power.
Trimpots typically have a square shape while rotary potentiometers have a round shape.
Adjustment of a rotary potentiometer is done with fingers. Adjustment of the majority of trimpots is done by turning an adjustment screw with a small trimmer screwdriver.
Depending on the kind of adjustment screw, trimpots can be:
Single turn
Multi-turn
Finger adjustment
Potentiometers can be linear or logarithmic.
Logarithmic potentiometers are usually used to adjust the volume of audio circuits in an amplifier or guitar, because of the logarithmic characteristic of the human ear.
Pots come in a variety of sizes, shapes and resistance values. Resistance of potentiometers is in a wide range from a few ohms to several megaohms. The most popular value of the potentiometer is 10K ohm.
The best brands of potentiometers and trimpots are Bourns and Ohmite.