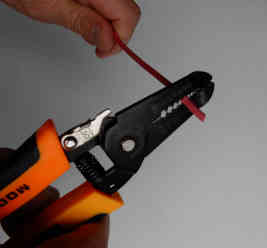
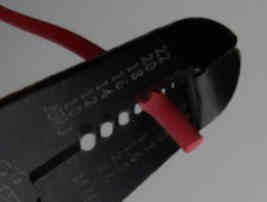
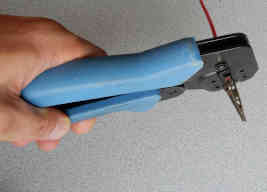
Using wire strippers, remove 3/8 “(9.5 mm) of insulation at the end of the wire you want to attach to the alligator clip.
Use proper gauge slot on the wire strippers – that way you will not cut any of the strands.
Pinch the wire strippers around the wire just tight enough to cut through the isolation and then pull it away - it will slide isolation easily off the wire.
We are going to solder 18 AWG wire to an alligator clip so. we will strip insulation from the wire running it through 18AWG slot on the wire strippers.
Twist strands of stranded wire into a compact bundle.
It doesn’t matter if you twist them clockwise or counterclockwise.
Stranded wires are more flexible than solid wires.
Tinning
The next step is tinning wire. Wires should be tinned when they are ready to be soldered to alligator clips.
Tinning makes the wires easier to solder to alligator clips. Tinned wire makes a better connection.
Tinning wire with soldering iron is the process of coating it with a thin layer of molten solder. If tinning a stranded wire, solder also flows in between the copper strands of the conductors.
The majority of soldering irons have removable tips. Replace the iron tip before you turn on the soldering iron.
It is useful to have a small collection of iron tips with different shapes and diameters which may be changed depending on the soldering project. You should use only those iron tips which are recommended by the manufacturer for your particular model of soldering iron. For example, Weller soldering irons use ET series of soldering tips.
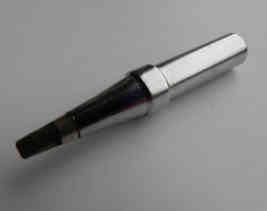
For soldering alligator clips and tinning wires select a bit bigger iron tip than when soldering circuit board.
Select screwdriver type iron tip 3/32” (2.38 mm), 5/64” (1.98) mm, or similar.
The soldering alligator clip is not a very delicate soldering operation so small flexibility in choosing iron tip is allowed.
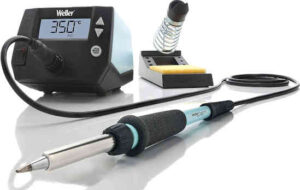
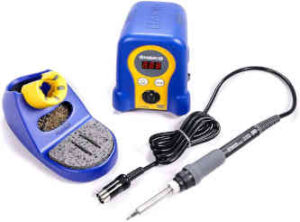
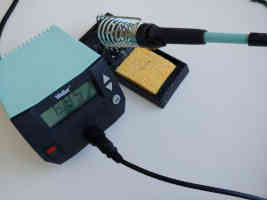
If possible, use a temperature-controlled soldering iron.
They come with a base station and heat-resistant iron bench stand.
You can buy a temperature-controlled soldering iron for less than $ 50.
Always store a hot soldering iron in an iron stand.
Bench iron stand usually comes with a sponge. Pour a little bit of water on the sponge - the sponge should be damp, not soaking wet. Use a sponge to clean the hot iron tip whenever you notice residue or excess solder on it.
Turn on the electrical soldering iron and set the temperature to 750 F (400 C).
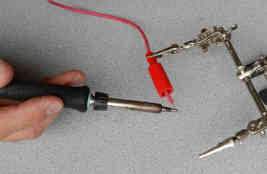
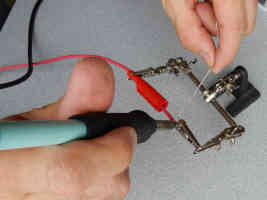
While you are waiting for soldering iron to reach set temperature, place wire in helping hand tool.
Use a boot of alligator clip to protect the wire from damage since sharp teeth of the alligator clip from the helping hand tool may bite deep into the insulation of the wire while it holding the wire.
A helping-hand tool (also known as a third-hand tool) is very helpful when it comes to holding wires and some electronic components. Some models of helping-hand tools come with a magnifying glass. A magnifier is useful for repair and DIY work.
First, you have to tin iron tip and then to tin the wire.
Melt some solder on the iron tip when the soldering iron is hot enough. Once the iron tip is completely covered with a thin layer of solder, wipe it on a moist sponge. After tinning, the iron tip should look bright and shiny.
When someone learning how to solder, one of the biggest mistakes is attempting to solder with a dirty iron tip.
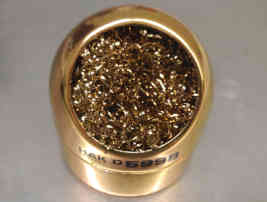
If your iron has a thick layer of corrosion and oxide, use tip cleaner with brass wire to remove contamination from the tip before tinning it.
Simply insert soldering iron in the brass tip cleaner and twist the iron a few times.
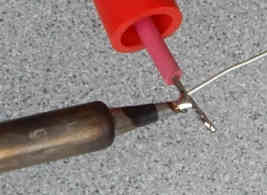
Apply a small amount of rosin flux on the exposed strands of the bare conductor.
Place tip of soldering iron on the wire.
The flux will start melting – you will see smoke and vapors coming from rosin flux when it changes from a solid to a liquid state.
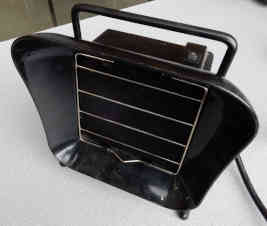
It is highly recommended to use a benchtop fume extractor to absorb the fumes produced during the soldering process.
A typical bench-top fume extractor consists of a small fan that draws fumes away from the technician’s face and filters out some smoke particles.
The carbon filter on the fume extractor is replaceable and should be replaced regularly.
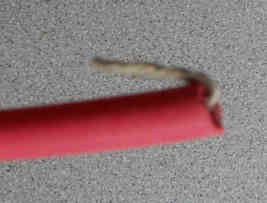
Let the iron heat up the wire for a few seconds, then apply the solder at the point of contact between the soldering iron and the wire.
Use enough solder to cover all surfaces of the exposed end of the wire.
Insulation on the wire may shrink a little bit after tinning.
Soldering alligator clips
One of the main factors affecting the quality of soldering is the cleanliness of surfaces to be soldered and the iron tip itself. Solder simply will not bond to dirty surfaces.
Make sure that alligator clips are clean and without rust, oil, or any other contamination. Use alcohol to clean dirty areas, if needed.
The quick and easy technique
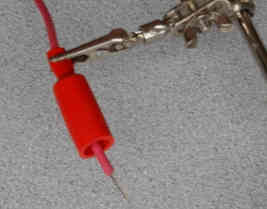
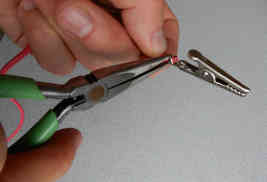
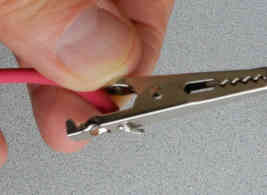
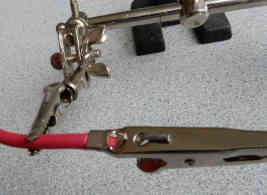
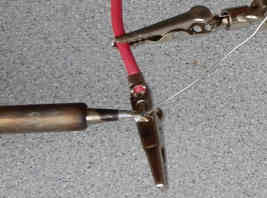
Place alligator clip in helping hand tool.
Use the other clip of the helping hand tool to hold the wire as shown in the picture.
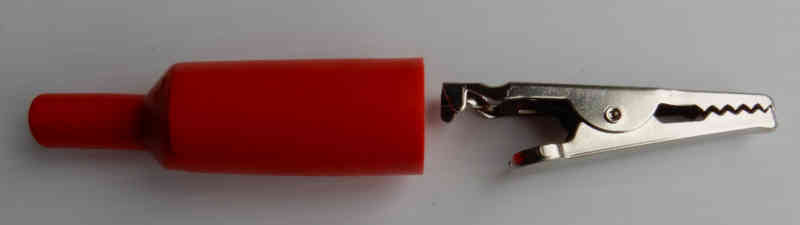
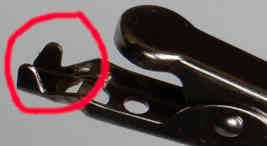
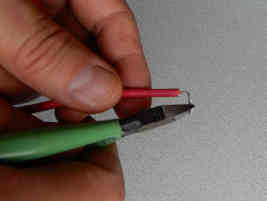
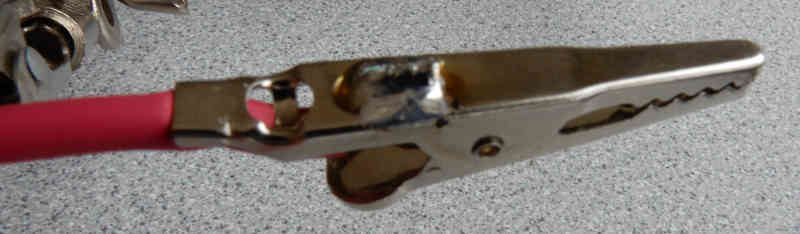
The alligator clip has two little metal wings sticking out from the sides.
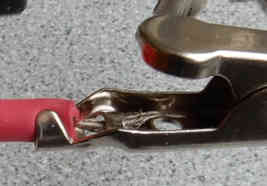
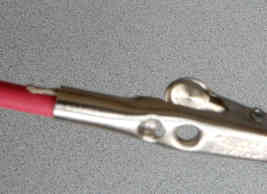
Insert the wire into the alligator clip in such a way that the insulated end of the wire lays between wings and the exposed end of the wire runs through the circular hole in the middle of the alligator clip as shown in the picture.
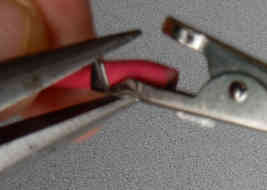
Squeeze the wings over the wire with needle-nose pliers to hold it tight.
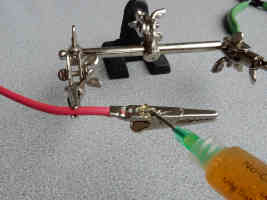
Apply a small quantity of solder flux on the alligator clip at the point where the wire touches the alligator clip.
Now let’s solder the wire to the alligator clip.
Start heating wire with soldering iron. Make sure that the tip of your soldering iron is touching both the wire and alligator clip.
How long this heating wire process will take depends on how hot your soldering iron is. For soldering alligator clips is best to use soldering iron which wattage is 50W-70W. If you use a soldering pencil which wattage is 20W-30W, it will solder wires to alligator clips but it will take a longer time.
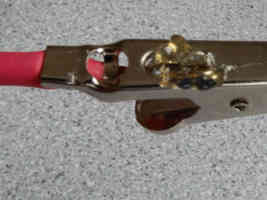
After five seconds apply solder to the connection.
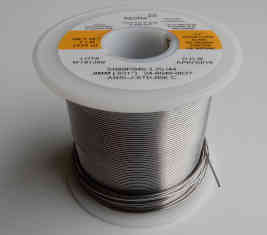
When soldering alligator clips use flux-cored soldering wire which diameter is 0.031” (0.8 mm) or bigger.
As its name suggests, flux-cored soldering wire contains rosin flux in its core.
Rosin flux prevents oxidation on surfaces of the metals during the soldering process so that molten solders can bond them.
In this guide we are using flux-cored, 60/40 soldering wire (an alloy of 60% tin and 40% lead) which diameter is 0.031” (0.8 mm).
If the alligator clip is hot enough, the solder will start to melt and bond to the surface of the alligator clip.
Remove iron, clean iron tip on a moist sponge, and place the iron in the iron stand.
Wait until the solder solidifies. Don’t touch the alligator clip with your hands yet because it is very hot. It takes a couple of minutes until it cools down.
Slide boot over the metal part of the alligator clip.
Stronger connection technique
Using wire strippers, remove 3/8 “(9.5 mm) of insulation at the end of the wire.
Tin wire as it was explained above.
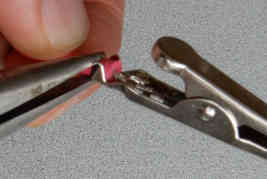
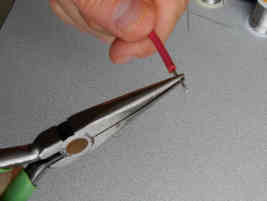
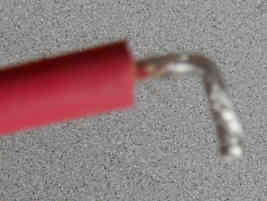
Bend the exposed end of the wire with needle-nose pliers.
Cut the excess wire with wire cutters.
Insert the exposed end of the wire to the alligator clip through the hole in the middle of the alligator clip.
Bend the wire and run the insulated part of the wire between the wings at the end of the alligator clip.
Squeeze the wings over the wire with pliers to hold it tight.
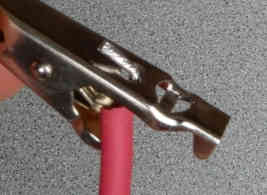
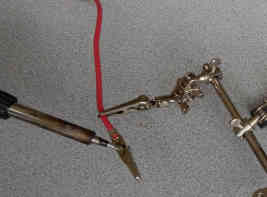
Place alligator clip upside down in the helping hand tool.
You should solder the wire to the backside of the alligator clip.
Apply a small quantity of solder flux on the back alligator clip at the point where the wire touches the alligator clip.
Apply soldering iron to the back of the alligator clip (at the contact point of the wire and alligator clip) to heat the joint.
As there is a lot of metal in the alligator clip to heat, allow several seconds to heat it up.
Feed soldering wire to the connection.
Molten solder will bond to the hot surfaces of the alligator clip and the wire.
Remove soldering iron and place it in the iron stand.
How to attach alligator clips to wire
The connection between a wire and an alligator clip can be made with crimping.
Most of the commercial test leads or jumper wire available on the USA market come with crimped alligator clips since it is cheaper to manufacture crimped than soldered alligator clips. A jumper wire is a wire which has alligator clips on both ends.
Another reason for crimping is that crimped connections retain all the flexibility of stranded wire avoiding problems of wires breaking off.
Remove 3/8 “(9.5 mm) of insulation at the end of the wire using wire strippers as we did in previous examples.
If you use stranded wire, twist the wire with your fingers.
Fold exposed wire back over the insulation before you crimp..
Insert the wire inside of the barrel.
Place jaws of the crimping tool around the barrel and crimp it.
In this “How to solder alligator clips” guide is used the following tools:
soldering iron with iron stand and sponge
wire strippers
needle nose pliers
wire cutters
fume extractor
In this “How to solder alligator clips” guide is used the following accessories: